Tabela de Conteúdos
![]()
Página desactualizada Esta página contém uma versão anterior deste guia que pode estar desatualizada. Para a consultar a versão mais recente clique aqui.
3.4.1 Servidor MySQL
Objetivo
Instalar o servidor de base de dados MySQL, com uma configuração mínima.
A instalação por omissão do MySQL só aceita ligações a partir do próprio posto (localhost). Dado que que a base de dados só será utilizada por aplicações do próprio posto, isto será uma vantagem em termos de segurança.
Instalação
root@server:~# aptitude install mysql-server mysql-client
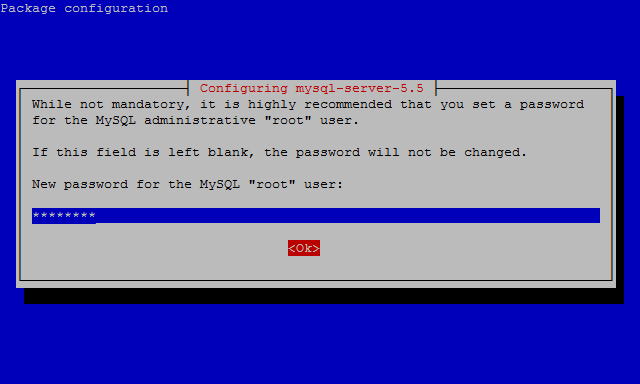
Durante o processo de instalação é pedida a password de root do servidor MySQL. Este utilizador root é específico do MySQL, pelo que deve ter uma password diferente do root do sistema.

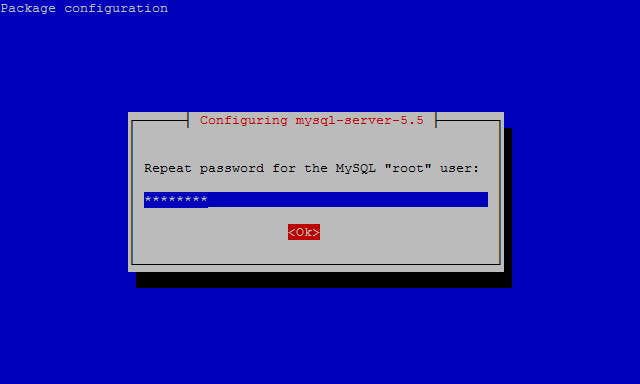
E a sua confirmação:

Configuração
Por segurança e melhor compatibilidade, a configuração predefinida do MySQL aceitará apenas ligações locais (endereço 127.0.0.1). Caso se pretenda aceder ao servidor MySQL a partir da rede interna, podemos substituir o bind-address pelo endereço do nosso servidor (192.168.1.100), no ficheiro e configuração /etc/mysql/my.cnf.
- /etc/mysql/my.cnf
# [...]
# Instead of skip-networking the default is now to listen only on
# localhost which is more compatible and is not less secure.
bind-address            = 127.0.0.1
# [...]
Verificação
A partir deste momento será possível aceder ao monitor do MySQL:
root@server:~# mysql -u root -p
Enter password:
Welcome to the MySQL monitor.  Commands end with ; or \g.
Your MySQL connection id is 42
Server version: 5.5.30-1.1 (Debian)

Copyright (c) 2000, 2013, Oracle and/or its affiliates. All rights reserved.

Oracle is a registered trademark of Oracle Corporation and/or its
affiliates. Other names may be trademarks of their respective
owners.

Type 'help;' or '\h' for help. Type '\c' to clear the current input statement.

mysql> show databases;
+--------------------+
| Database           |
+--------------------+
| information_schema |
| mysql              |
| performance_schema |
| test               |
+--------------------+
4 rows in set (0.02 sec)

mysql> quit
Bye
root@server:~#
Segurança
Após a instalação é conveniente garantir a segurança da instalação MySQL com o comando mysql_secure_installation. Este programa permite, entre outras coisas, alterar password da conta root do MySQL, desligar alguns acessos externos e apagar as bases de dados de testes.
root@wheezy:~# mysql_secure_installation


NOTE: RUNNING ALL PARTS OF THIS SCRIPT IS RECOMMENDED FOR ALL MySQL
      SERVERS IN PRODUCTION USE!  PLEASE READ EACH STEP CAREFULLY!


In order to log into MySQL to secure it, we'll need the current
password for the root user.  If you've just installed MySQL, and
you haven't set the root password yet, the password will be blank,
so you should just press enter here.

Enter current password for root (enter for none):
OK, successfully used password, moving on...

Setting the root password ensures that nobody can log into the MySQL
root user without the proper authorisation.

You already have a root password set, so you can safely answer 'n'.

Change the root password? [Y/n] n
 ... skipping.

By default, a MySQL installation has an anonymous user, allowing anyone
to log into MySQL without having to have a user account created for
them.  This is intended only for testing, and to make the installation
go a bit smoother.  You should remove them before moving into a
production environment.

Remove anonymous users? [Y/n]
 ... Success!

Normally, root should only be allowed to connect from 'localhost'.  This
ensures that someone cannot guess at the root password from the network.

Disallow root login remotely? [Y/n]
 ... Success!

By default, MySQL comes with a database named 'test' that anyone can
access.  This is also intended only for testing, and should be removed
before moving into a production environment.

Remove test database and access to it? [Y/n]
 - Dropping test database...
 ... Success!
 - Removing privileges on test database...
 ... Success!

Reloading the privilege tables will ensure that all changes made so far
will take effect immediately.

Reload privilege tables now? [Y/n]
 ... Success!

Cleaning up...


All done!  If you've completed all of the above steps, your MySQL
installation should now be secure.

Thanks for using MySQL!